
Ingredients
-
-
2
-
1
-
1/4
-
1
-
-
3
-
3
-
12
-
12
-
-
-
-
-
Directions

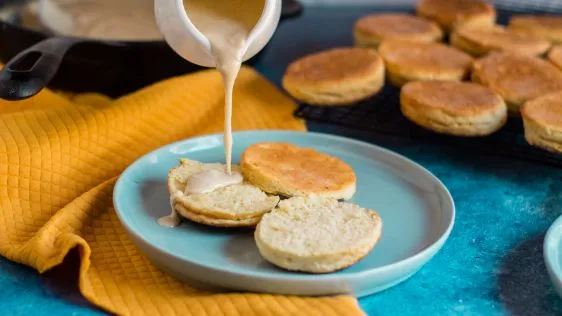
Real, “down Home” Southern Country Biscuits and Gravy:,Real, “down home” biscuits and gravy was originally “poor folks’ breakfast,” but it was so good and became so popular that no self-respecting Southern home today is complete without a good biscuit and gravy recipe. The gravy is still referred to by many as “sawmill gravy,” because gravy and biscuits was a quick, cheap, and filling breakfast that was served in the logging and sawmill camps throughout the South. Real “down home” Southern biscuits and gravy became so popular and such a staple in Southern breakfast diets because it is nutritious, simple, easy, and inexpensive to make. The ingredients are simple and can be found in any kitchen. Sausage gravy, egg gravy, and all the variations begin with the basic “Sawmill” or “Milk” gravy recipe. The recipe given here is the basic sawmill gravy recipe that is still used by most Southerners. It is the recipe that my family has used for several generations. As for the biscuits, there are lots of complicated recipes for biscuits “out there”, but the real, honest-to-goodness biscuits that are served up in most Southern homes are simple and easy to make. The baking time is the most time consuming part of making good biscuits. The biscuit recipe I give here has also been used by my family for several generations. When made as directed, the results will be light, fluffy, melt-in-your-mouth biscuits that are delicious with the basic gravy recipe that I also give here, as well as with one’s favorite jam, jelly, marmalade, molasses, or honey–or just split open with a little butter melted inside. To make sausage gravy or other variations, cook up the sausage first and use the fat from it to make the rue for the gravy. Break up the sausage into small pieces and set within easy reach before starting the gravy When the gravy has thickened, stir in the sausage or other ingredients that you may have in mind. Adding other ingredients is the last step in making variations of the basic “sawmill” or milk gravy recipe. In the biscuit recipe, Martha White self-rising flour is preferred. It is finer ground flour than almost any other flour on the market, has superb leavening, and yields lighter biscuits. If plain flour is used, add 1-1/4 tsp of double-acting baking powder and 1/4 tsp of salt per cup of flour. These pertain to all-purpose flour only and should be omitted when using self-rising flour. Also, the rule of thumb for eggs is to use 1 egg for every 2 cups of flour. When making biscuits and gravy, one thing should be remembered: Make the biscuits first, and make the gravy while the biscuits are baking. Preheat oven to 350 degrees F. Baking time for biscuits is 20-30 minutes, depending on your oven. Some ovens run a little hot or cool, so baking time may vary slightly.,I’ve never had this without country style sausage in the gravy.,I am puzzled by the instruction to put the milk mixture into the roux all at once. I have always found that roux-thickened sauces work better if you add the liquid gradually, while whisking constantly to prevent lumps. Also helpful to use pre-warmed liquid for easier combining.
Discover ground-breaking new supplements! SHOP & SAVE
Steps
|
1
Done
|
For the Biscuits: |
|
2
Done
|
Wash Hands. |
|
3
Done
|
Sift Flour Into a Medium or Large Mixing Bowl. Shake the Bowl Side-to-Side Lightly to Even Out the Flour. |
|
4
Done
|
Beat the Eggs Slightly to Blend Yolks and Whites. |
|
5
Done
|
Combine Oil and Egg With Half the Buttermilk and Pour Into the Flour. Mix Thoroughly With a Large Spoon or Fork, or Use Your Hand to Squeeze the Dough Through Your Fingers, Until the Dough Is Well Blended. |
|
6
Done
|
Add the Remaining Buttermilk, a Little at a Time, Blending Into the Dough After Each Addition, Until the Right Consistency Is Achieved. |
|
7
Done
|
the Dough Should Be Just Firm Enough to Form Into Balls but Light Enough to Slump Slightly When Placed Onto the Baking Sheet. Experience Will Enable You to Tell from the Feel of the Dough. If Dough Is Too Light, Add Flour, 1 Tablespoon at a Time, Mixing Thoroughly Each Time, Until the Dough Is the Right Consistency. If Dough Is Too Dense (stiff), Add Buttermilk, 1 Tablespoon at a Time, Blending Well Into the Dough After Each Addition, Until the Dough Is the Right Consistency. |
|
8
Done
|
Clean the Dough Off Your Hands, Then Rinse and Dry Them. Flour the Palms and Fingers of Both Hands to Prevent the Dough from Sticking to Them. |
|
9
Done
|
Pinch Off a Handful of Dough Roughly 2/3 the Size You Want Your Biscuits to Be and Roll It Between Your Hands in a Circular Motion, Using Just Enough Pressure to Form a Ball. Shaping the Dough Will Flour the Outside of the Biscuit. |
|
10
Done
|
Place the Ball of Dough Onto an Ungreased Baking Sheet and Press Down With Fingers Just Enough to Flatten the Dough Slightly and Form the Biscuit Shape. Repeat, Flouring Hands After Each Dough Ball Is Formed and Placing Biscuits About 1/2-Inch to 3/4-Inch Apart, Until All the Dough Is Used Up. |