Ingredients
-
-
1
-
2
-
1 1/2
-
1/2
-
1/2
-
1/2
-
-
2
-
2
-
2
-
2
-
2
-
2
-
2
Directions
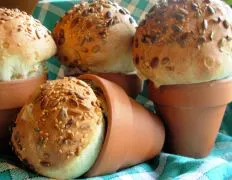
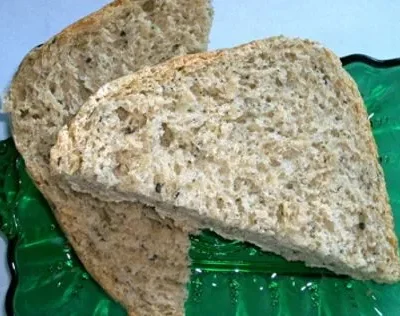
Rustic Flower Pot Bread Loaves or Bread Rolls, These Flower Pot bread loaves or bread rolls will certainly be a point of conversation and no doubt bring gasps of pleasure and admiration when you serve them! Moreover, they are so easy to make especially if you start your dough off in a bread machine Bread was originally baked in terracotta or clay pots, so these are not so different from old fashioned bread made many years ago You must make sure your flower pots are seasoned before you bake in them, but once they are seasoned they are ready to be used over and over again I have added a list of suggested extras, and I always like to sprinkle mixed seeds on top of these – they almost look like seeds that have been sown in the flower pots! I have listed ingredients for basic white bread here, but you can add wholewheat, granary or rye flour if you would like a variation I am sorry, but I have to say it, these flower pot loaves or rolls should turn out Blooming Marvellous ! Had to be said! Have fun NB: Strong white flour is the British culinary term for bread flour, flour that is used in breadmaking with a high gluten content All purpose flour is NOT strong bread flour and will NOT give the desired results in this bread recipe It NEVER crossed my mind that anyone would think that old flower pots are used in this recipe!! LOL! PLEASE use new plant pots and season them before baking the bread in them, as stated in the recipe I hope that helps those of you who may have been lost in translation !), I tried making these today and could not get them to rise above the rim Do I need to fill the dough all the way to the top? This is the highest I could get one out of all of them : (
Discover ground-breaking new supplements! SHOP & SAVE
Steps
|
1
Done
|
To Prepare the Flower Pots: |
|
2
Done
|
Take Two to Six Earthenware Flower Pots (3 to 6 Inches in Size). Wash Thoroughly and Grease Them Inside and Outside, With Lard, Butter or Oil. (please Use New Plant Pots, of Course!). |
|
3
Done
|
Heat in a Pre-Heated Oven at 190c; 375f: Gas 5, For 25-30 Minutes. |
|
4
Done
|
Repeat the Process Two or Three Times For a Good "seasoning" and Non-Stick Surface on Your Flower Pots. |
|
5
Done
|
Before Baking With Them, Line the Base With Greaseproof Paper or Baking Parchment - Especially If There Is a Hole in the Bottom of the Flower Pot! |
|
6
Done
|
to Make the Bread: |
|
7
Done
|
If You Are Using Dried Yeast. Dissolve One Teaspoon of Sugar in the Warm Water Then Add the Dried Yeast. Leave Until Frothy, About Ten Minutes. If You Are Using Fresh Yeast, Blend It Into the Warm Water. |
|
8
Done
|
Place the Flours, Salt and Sugar in a Large Mixing Bowl and Rub in the Butter. |
|
9
Done
|
(add Any Extras You Might Be Using Here.). |
|
10
Done
|
Add the Yeast Liquid to the Dry Ingredients and Mix to a Soft Dough. |
|
11
Done
|
Turn the Dough Onto a Work Surface and Knead the Dough by Folding Towards You, Then Pushing Down and Away from You With the Heel of Your Hand. Give the Dough a Quarter Turn and Repeat the Action. Knead Until Smooth and No Longer Sticky. |
|
12
Done
|
Cut the Dough in to Even Sized Pieces and Place in the Prepared and Well Oiled/Buttered Flower Pots, Which Should Be Placed on a Baking Tray. Glaze With Milk or Salted Water and Sprinkle With Mixed Seeds. |
|
13
Done
|
Place the Pots Inside a Large Oiled Polythene Bag and Leave in a Warm Place Until the Dough Doubles Its Size, About 45 - 60 Minutes. |
|
14
Done
|
Remove the Polythene Bag and Bake on the Middle Shelf of a Hot Oven at 230c (450f) or Gas 8 For 10 to 30 Minutes, Depending on the Size of Your Flower Pots, or Until the Bread Is Browned and Sounds Hollow When Tapped. |
|
15
Done
|
Remove the Bread from the Flower Pots and Cool on a Wire Rack. You Can Then Replace Them in the Flower Pots to Serve, Once They Have Cooled! |

