Ingredients
-
2 3/4
-
2/3
-
1 1/2
-
1 1/2
-
1
-
-
-
-
-
-
-
-
-
-
Directions
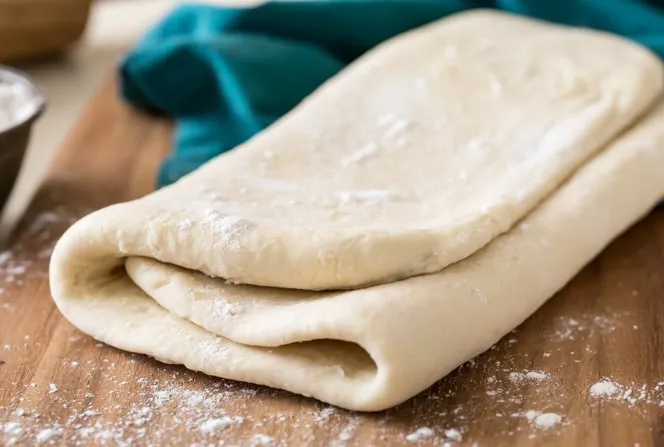
Puff Pastry from Scratch,Warning…this recipe is not for the faint of heart :o) It is just a tad labor intensive, but after watching two contestants get eliminated on Top Chef- Washington DC for not making a puff pastry from scratch and being told how bad their frozen, premade ones tasted, I had to find a recipe for it. This one is courtisy of Emeril Lagasse and is taken from a recipe for an Apple Tart Tatin with Homemade Puff Pastry. But I wanted to single out the Puff Pastry so that I could find it when I wanted to make something with it. PS- In case you were wondering- Yes, cake flour can make a big difference.Sometimes you can get away with using regular flour…sometimes not! Not sure about this recipe yet, but I don’t plan on risking it.,Warning…this recipe is not for the faint of heart :o) It is just a tad labor intensive, but after watching two contestants get eliminated on Top Chef- Washington DC for not making a puff pastry from scratch and being told how bad their frozen, premade ones tasted, I had to find a recipe for it. This one is courtisy of Emeril Lagasse and is taken from a recipe for an Apple Tart Tatin with Homemade Puff Pastry. But I wanted to single out the Puff Pastry so that I could find it when I wanted to make something with it. PS- In case you were wondering- Yes, cake flour can make a big difference.Sometimes you can get away with using regular flour…sometimes not! Not sure about this recipe yet, but I don’t plan on risking it.
Discover ground-breaking new supplements! SHOP & SAVE
Steps
|
1
Done
|
Sift Together the All-Purpose Flour, Cake Flour, and Salt Into a Large Mixing Bowl. |
|
2
Done
|
Dice 6 Tablespoons of the Chilled Butter, (returning the Remaining Butter to the Refrigerator to Keep Cold.) Place the Diced Butter Into the Mixing Bowl and Using Your Fingers or a Pastry Blender, Blend Until the Mixture Forms a Coarse Meal, Similar to a Piecrust. |
|
3
Done
|
Make a Well in the Center of the Mixture, Add the Water. Gradually Blend the Water With the Flour Mixture, Mixing Just Until a Rough, Sticky Dough Is Formed. |
|
4
Done
|
Wrap Dough in Plastic Wrap and Refrigerate For 1 Hour. |
|
5
Done
|
Place the Remaining Butter on a Work Surface, (a Marble Surface Is Ideal). Using a Rolling Pin or the Heal of Your Hand, Smash the Butter Into the Surface Until Pliable, Taking Care not to Over Work the Butter as It Should Stay Chilled. Work Butter Into a 5-Inch Square. |
|
6
Done
|
Remove the Rested Dough from the Refrigerator and Place on a Lightly Floured Work Surface. |
|
7
Done
|
Roll Out Dough Into a 12-Inch Circle, Being Careful not to Pull or Tear the Dough. (the Dough Mixture May Still Be Very Rough and Tacky.) |
|
8
Done
|
Place the Butter Square Into the Center of the Circle and Fold the Edges of the Dough Over the Butter, Pressing to Seal the Edges. You Should Now Have a Square of Butter Wrapped in Dough. |
|
9
Done
|
Using a Rolling Pin, Roll the Square Into a 16-by-8-Inch Rectangle. (the Dough May Need to Be Pounded With the Rolling Pin Several Times to Allow the Butter to Become More Pliable.) Be Careful not to Tear the Dough. |
|
10
Done
|
Fold the Rectangle 3 Times as You Would Fold a Business Letter. Place the Rectangle in Front of You Lengthwise and Roll Into Another 16 by 8-Inch Rectangle. Fold Again 3 Times as You Would a Business Letter and Make 2 Small Indentations Into the Dough to Remind Yourself That It Has Been Rolled Twice. |
|
11
Done
|
Wrap the Dough in Plastic Wrap and Refrigerate For 1 Hour. |
|
12
Done
|
Return the Rested Dough to a Lightly Floured Surface and Repeat the Process of Rolling the Dough Into a Rectangle, Making 3 Business-Letter Folds, 2 Times. |
|
13
Done
|
Make 4 Small Indentations Into the Dough to Remind Yourself That It Has Been Rolled a Total of 4 Times. |
|
14
Done
|
Wrap the Dough in Plastic Wrap and Refrigerate For at Least 1 Hour. If Desired, Dough Can Rest Refrigerated For Up to 2 Days at This Point. |
|
15
Done
|
Remove the Dough from the Refrigerator and Place on a Lightly Floured Work Surface. |


