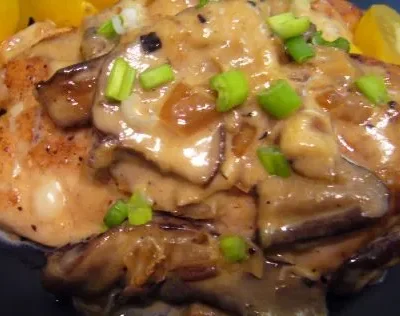
Ingredients
-
1
-
-
-
-
-
-
-
-
-
-
-
-
-
-
Directions
Sous Vide Chicken Breast, Since the dish is tightly sealed and cooked in a controlled temperature water bath, it helps foods retain their natural juices and allows the cook to effectively add flavor In a professional kitchen, the food is vacuum sealed and cooked in an immersion bath This equipment is still too expensive for most home cooks, but there are several ways around it You can use a large heavy duty cooler with a lid – that’s right, cooler – with a probe thermometer All you have to do is preheat the cooler with hot tap water for about 10 minutes, then empty and fill with water the temperature you desire Keep extra boiling water on hand to add if the temperature in the cooler cools You need food grade plastic to vacuum seal the food If you don’t have a vacuum sealer, guess what? You can still do it Freezer safe plastic storage bags are safe up to 195 degrees F Since even if you squeeze out all the air, they do not make a very tight seal, it is best if you include some oil or flavoring liquid in the bag You can also use food grade plastic wrap Your food can even be cooked on the stovetop, but it is more difficult to maintain the even temperature required for this type of cooking method; but it can be done with vigilance This recipe is for one, but six of more can be cooked at the same time in one water bath Just watch the temperature and add more hot water as needed to maintain temperature , I cannot speak for the method & temperatures listed here I do have a Sous Vide The Sous Vide apparatus heats and circulates the water, is a great way to cook chicken breast You will never have a moister result However, the water bath temperature for chicken breasts is 140?F in the controlled heated bath, cooking time is 40 minutes Once it is fully cooked, leave it in the water bath for another 20 minutes to pasteurize it It will not overcook, that’s the beauty of Sous vide The core temperature of the chicken will be 60?C / 140?F It’s delicious , Since the dish is tightly sealed and cooked in a controlled temperature water bath, it helps foods retain their natural juices and allows the cook to effectively add flavor In a professional kitchen, the food is vacuum sealed and cooked in an immersion bath This equipment is still too expensive for most home cooks, but there are several ways around it You can use a large heavy duty cooler with a lid – that’s right, cooler – with a probe thermometer All you have to do is preheat the cooler with hot tap water for about 10 minutes, then empty and fill with water the temperature you desire Keep extra boiling water on hand to add if the temperature in the cooler cools You need food grade plastic to vacuum seal the food If you don’t have a vacuum sealer, guess what? You can still do it Freezer safe plastic storage bags are safe up to 195 degrees F Since even if you squeeze out all the air, they do not make a very tight seal, it is best if you include some oil or flavoring liquid in the bag You can also use food grade plastic wrap Your food can even be cooked on the stovetop, but it is more difficult to maintain the even temperature required for this type of cooking method; but it can be done with vigilance This recipe is for one, but six of more can be cooked at the same time in one water bath Just watch the temperature and add more hot water as needed to maintain temperature
Discover ground-breaking new supplements! SHOP & SAVE
Steps
|
1
Done
|
Preheat (see Description) and Prepare a 165 Degree F Water Bath. |
|
2
Done
|
For Best Results Leave as Much Skin on the Chicken as Possible, but Trim Any Extra Fat; Season All Sides With a Small Pinch of Salt. |
|
3
Done
|
Allow the Chicken to Come to Room Temperature Before Sealing in the Plastic. |
|
4
Done
|
to Effectively Encase in Plastic Wrap, You Should Use Several Layers and Fold Over the Edges to Give You Something to Grip Because You Will Need to Put Pressure on the Wrap to Eliminate Any Air Pockets to Get a Good Seal. |
|
5
Done
|
Once in the Plastic, Shape the Chicken Into a Cylinder, Then Tie Off the Ends. |
|
6
Done
|
Cook in the Water Bath For 45 Minutes, Maintaining a Temperature of 165 Degrees F. |
|
7
Done
|
Remove the Chicken from the Water and Insert a Probe Thermometer to Ensure the Chicken Has Reached a Temperature of 165 Degrees F (if It Is not Done, Return It to the Water, Hole and All, Until It Is). |
|
8
Done
|
Once Done, Let Chicken Rest 10 Minutes; Cut One End of the Plastic and Slide Chicken Out. |
|
9
Done
|
Remove Excess Moisture With Paper Towels. |
|
10
Done
|
Heat a Pan With a Film of Canola Oil and Sear to Crisp the Skin; Slice and Serve. |

