Ingredients
-
2
-
1 1/4
-
3
-
1/2
-
1
-
3
-
1
-
1/4
-
-
-
-
-
-
-
Directions
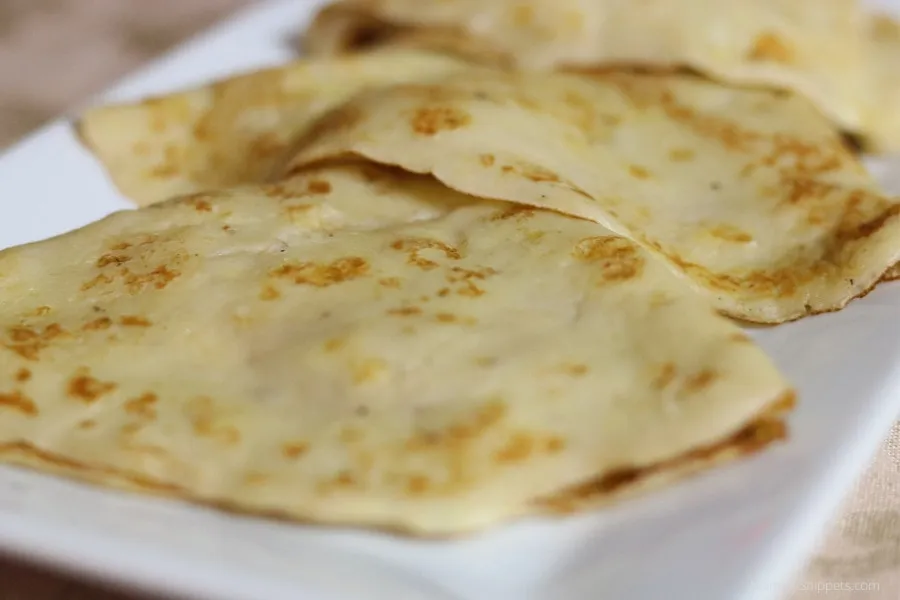
Banana Crepes,These are delicious dessert or breakfast crepes with banana flavor within the crepe itself. They are really good with Recipe #209347. I like to use a paper towel with a little butter on it to swipe the pan before adding the batter. This recipe works best with a non-stick pan or a crepe maker. You must use a very ripe banana to get the full banana flavor. The recipes include very detailed instructions which are great if this is your first time to make crepes. From Crepes & Omelettes.,Easy & delicious. I like to make it the night before & ready to cook the next morning.
Discover ground-breaking new supplements! SHOP & SAVE
Steps
|
1
Done
|
Place Ingredients in Blender or Food Processor Container in the Order Listed. |
|
2
Done
|
Cover and Blend on High 20 to 30 Seconds. Scrape Sides of Container. Blend a Few More Seconds. |
|
3
Done
|
Pan Preparation: If Using a Non-Stick Spray Shortening, Spray Pan Before Heating. Before Cooking the First Crepe Put 1/2 Teaspoons Butter Into Pan. If the Pan Is Well Seasoned It Should not Be Necessary to Add More Butter For Each Crepe. |
|
4
Done
|
Pan Temperature: Crepe Pan Is at the Correct Temperature When the Batter Sizzles Slightly When Poured Into the Pan, and a Crepe Will Cook on One Side in Approximately 1 Minute. (on My Stovetop I Set to Medium-Low). Crepes Should Be Pale in Color, not Dark Brown. |
|
5
Done
|
to Cook Crepes: Two or Three Tablespoons of Batter Is Usually Enough to Cover the Bottom of a 6 to 7 Inch Crepe Pan. ( use a 10 Inch Pan With Scant 1/4 Cup Batter). If Necessary Adjust the Amount Needed For the Pan You Are Using. |
|
6
Done
|
Pour in the Batter and Quickly Tilt the Pan So the Batter Covers the Bottom Entirely. If You Put in More Than Just a Thin Coating, Pour the Excess Back Into the Bowl. This Will Leave a Small Flap on the Crepe but It Won't Be Noticed When the Crepe Is Filled and Folded. (caution: If Crepe Pan Is not Hot Enough, the Whole Crepe May Fall Back Into the Batter When You Pour Out the Excess. It Is Important to Have the Pan at the Correct Temperature Before Starting to Cook.). |
|
7
Done
|
When to Turn: the Crepe Is Ready to Turn When It Begins to Set and Crisp Around the Edges. Loosen Around the Edge With a Long Thin Spatula or Knife So You Have a Starting Place to Pick Up the Crepe With Your Fingers (or the Spatula) Then Simply Flip It Over. Should It Start to Tear When Picked Up, It May not Be Cooked Enough to Turn. Cook a Few Seconds Longer and Try Again. |
|
8
Done
|
Crepe Is Ready When the Second Side Is Set (not Wet). |
|
9
Done
|
If Pan Sticks in One Spot: Put More Butter or Oil in the Pan and Wipe With a Paper Towel. Once a Crepe Pan Is Seasoned, It Should not Be Necessary to Add More Butter or Oil For Each Crepe. It May Be Necessary to Discard the First Crepe or Two Until the Pan Is Properly Seasoned and the Temperature Is Right. |
|
10
Done
|
After the Crepes Are Cooked: Stack Cooked Crepes on a Plate. They Will Be Easier to Separate If They Are not Placed Squarely on Top of Each Other. It Is not Necessary to Put Foil or Waxed Paper Between Each Crepe. |
|
11
Done
|
Presentation: Crepes Can Be Filled and Rolled or Folded Into Quarters. |

