Ingredients
-
375
-
150
-
1/2
-
2
-
1
-
3
-
375
-
2 - 3
-
-
-
-
-
-
-
Directions
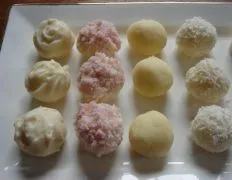
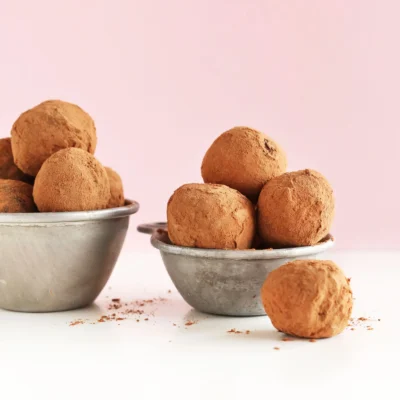
Coconut Cream Truffles, I ripped this out of a magazine I was finished with while traveling abroad they looked so tempting I’m not a big fan of white chocolate or coconut flavour but made them for a party and thought hubby would love them well, shock ! they were the surprise hit of the party & I really like these too 🙂 They made it into my family handwritten recipe book It’s easy to make and can be made in advance, both major points for making it onto my menu’s Recipe calls for Coconut essence and I can’t get it here in The Netherlands it probably makes the taste a little less intense You choose if you are a true fan of coconut throw it in, if you don’t have it or like the taste as much, I wouldn’t worry at all about not adding it Enjoy ! Note: butter measurement 150g = 5 1/4 oz and chocolate measurement 375g = 13 1/4 oz , I made this recipe last night and it turned out divine! I made a few alterations such as 1 tsp of coconut extract and 1 tsp of almond extract Added 1/2 cup more of the unsweetened coconut flakes Easy to roll and decorate:) Some I dipped into chocolate, others rolled in coconut, sprinkled with sugar, or designed with different colored melted chocolate on top! The outcome looks so professional – and make a great gift for anyone
Discover ground-breaking new supplements! SHOP & SAVE
Steps
|
1
Done
|
Gently Melt Butter and White Chocolate in Large Bowl in Microwave. |
|
2
Done
|
For Best Results Don't Over Melt, If Just a Few Chocolate Pieces Appear Solid, Stir Them in With What Has Already Melted Until It's All Smooth. |
|
3
Done
|
Add Coconut Milk, Coconut Essence (optional), Desiccated Coconut and Icing Sugar. |
|
4
Done
|
Stir Until Well Mixed. |
|
5
Done
|
Recipe Says Chill So You Can Roll It Into Balls, Freeze Etc, but Personally I Spooned My Mixture Into Two Small Plastic Bags So That It Formed Slabs About 2cm Thick, Then Threw It Into the Freezer For at Least 2 Hours. |
|
6
Done
|
Remove Slabs from Freezer, Peel Away Plastic Bags And"dice" Your Mixture So That You Have a Plate Full of Little Cubes. |
|
7
Done
|
Microwave Your Dark or Milk Chocolate Mixture Until Half of It Is Melted, Stir Until All Is Smooth (doing It Like This Meant That the Mixture Started to Set Quickly and Evenly Around the Cubes and Didn't Just Make Puddles at Their Bases). |
|
8
Done
|
Dip the Cubes One by One Into the Darker Chocolate Mixture, Turning Over With a Teaspoon Until Evenly Coated. |
|
9
Done
|
Place Coated Cubes Onto a Tray Lined With Foil. |
|
10
Done
|
Leave at Room Temperature to Set, and Store in a Cool Place (not the Fridge). |
|
11
Done
|
Edited to Add: Making the Filling Into Round Balls Does Look More Professional and Less "home Made" -- Mind You, Once Your Family and Friends Have Tasted These They Honestly Won't Care How They Look, They'll Be Too Busy Diving Back in For Another One :). |
|
12
Done
|
I Loved the Suggestion About the Other Flavours and Played Around With It -- Some of My Guests Preferred 2t Tia Maria Etc For a Softer More Mellow Taste, Other Preferred Theirs With 3t For a Stronger Taste. |
|
13
Done
|
the Mixtures With the Baileys/Tia Maria Were Softer and a Little More Sticky Than the Original, So *slightly* More Messy Rolling Them, but Your Guests Will Love You For the 10 Minutes Extra Work. |

