Ingredients
-
1 - 2
-
1/2 - 1
-
1/2 - 2
-
-
-
-
-
-
-
-
-
-
-
-
Directions
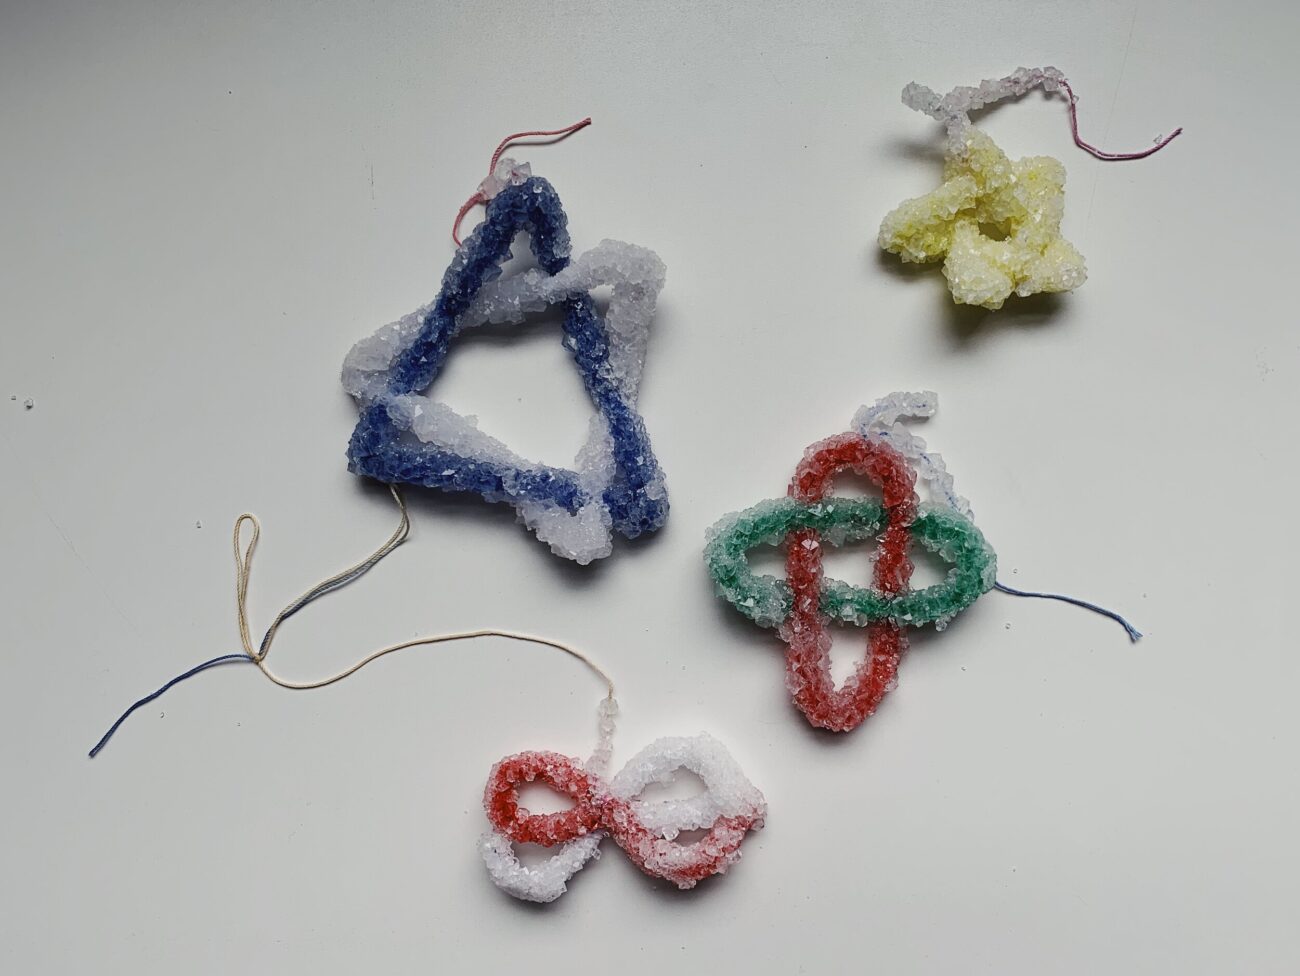
Crystal Ornaments (Borax), My daughters and I make these every year You can change the look of the crystals by using different color and textures of pipe cleaners (chenille stems) Just choose your color and choose your shape: stars, snowflakes, trees, gingerbread men The girls especially love using glittery white and silver ones to make ‘snowflakes’ We don’t just do these at Christmas, either We’ve used them on our Christmas tree, to hang in our windows, to decorate packages and gift baskets, for grandparents, initials (fun to spell out the kids’ names), mobiles, etc One year we found red and white striped pipe cleaners and made really cute hearts for Valentine’s Day to take with a plate of cookies to some shut-in’s They make darling flowers, too The only limit is your imagination :o) They are fairly sturdy but the crystals can be knocked off if hit too hard so we spray ours with clear acrylic spray paint/shellac when they’re dry (especially the ornaments that we want to use year after year) We haven’t tried adding food color to the water yet, but that’s on our list of possible variations to see if it works the same We have also tried reheating and reusing the solution, but with mixed results and you would need to dissolve more Borax in if you do that , Lots of fun with pretty results These are great for young children since the crystals form so much quicker than salt or sugar crystals , Thank you so much for this recipe My children and I had a great time creating beautiful ornaments and some fond Christmas memories
Discover ground-breaking new supplements! SHOP & SAVE
Steps
|
1
Done
|
Choose Your Pipe Cleaner Color and Form Into Desired Shape (remember You Can Cut and Wire Them Together, Especially For Snowflakes!). |
|
2
Done
|
Tie a String or Thread to the Top of the Ornament and Tie the Other End to the Middle of a Pencil So That It Looks Like a Letter 't' -- There Won't Be Much Length Between the Pencil and the Ornament, Just Enough to Hang Down from the Top of the Jar to the Borax Solution. |
|
3
Done
|
Fill a Wide-Mouth Jar/Container With Boiling Water (we Typically Use Large Canning Jars; the Size of Your Container Will Depend on the Size of Your Pipe Cleaner Creation). |
|
4
Done
|
Add Borax in Increasing Amounts Until Water Is Cloudy Even After the Borax Is Dissolved (this Is Why We Use Glass Jars Most of the Time, Although We Have Also Made the Mixture Up in Glass Jars and Poured It Into Empty Margarine Containers, Etc, If Their Size Worked Better) -- This Part Is a Bit Science, a Bit Art and May Take Some Adjusting to Get the Levels Right. |
|
5
Done
|
Balance the Pencil Across the Top of the Jar and Suspend the Ornament in the Hot Borax Mixture, Making Sure the Pipe Cleaner Is Completely Immersed but Does not Touch the Bottom or Sides of the Container. |
|
6
Done
|
Put Jar in an Undisturbed Place; as the Solution Cools, Crystals Will Form on the Pipe Cleaner. |
|
7
Done
|
the Longer You Soak It, the More Crystals You Will Have and the Less the Original Pipe Cleaner Will Show Through, So Adjust Time Until You Achieve Your Desired Look -- Overnight Will Give You Very Thick Crystals, a Few Hours Will Give You Just a Gentle Glittery Look. |
|
8
Done
|
Remove from Solution and Let Dry. |
|
9
Done
|
Spray With Clear Acrylic If Desired. |

