Ingredients
-
1 3/4
-
1 1/2
-
1 1/2
-
4
-
1/2
-
1/2
-
7
-
-
-
-
-
-
-
-
Directions
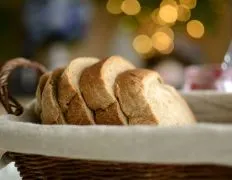
Easy No-Knead Challah Bread, A fabulously easy recipe from Artisan Bread in Five Minutes a Day by Jeff Hertzberg and Zoe Francois that bakes a beautiful golden laof This recipe takes very little effort (you basically need to mix ingredients in a bowl for a minute), but you do need to give the dough time to rise Makes four 1-pound loaves The recipe is easily doubled or halved You can freeze or refrigerate unused dough , We had to add extra flour to make it work but it rose great and rolled out easy enough and all around, it baked perfectly at 25 minutes so, I’m pretty excited at the simplicity! The real test will be when my kids come home for dinner tomorrow and eat it all up If they don’t know the difference then this is a keeper I have a feeling it’s gonna be a hit!
Discover ground-breaking new supplements! SHOP & SAVE
Steps
|
1
Done
|
Mixing and Storing the Dough: Mix the Yeast, Salt, Eggs, Honey, and Melted Butter (or Oil) With the Water in a 5-Quart Bowl, or a Lidded (no Airtight) Food Container. |
|
2
Done
|
Mix in the Flour Without Kneading, Using a Spoon, a 14-Cup Capacity Food Processor (with Dough Attachment), or a Heavy-Duty Stand Mixer (with Dough Hook). If You're not Using a Machine, You May Need to Use Wet Hands to Incorporate the Last Bit of Flour. |
|
3
Done
|
Cover (not Airtight), and Allow to Rest at Room Temperature Until the Dough Rises and Collapses (or Flattens on Top), Approximately 2 Hours. |
|
4
Done
|
the Dough Can Be Used Immediately After the Initial Rise, Though It Is Easier to Handle When Cold. Refrigerate in a Lidded (not Airtight) Container and Use Over the Next 5 Days. Beyond 5 Days, Freeze in 1-Pound Portions in an Airtight Container For Up to 4 Weeks. Defrost Frozen Dough Overnight in the Refrigerator Before Using. Then Allow the Usual Rest and Rise Time. |
|
5
Done
|
on Baking Day, Butter or Grease a Cookie Sheet or Line With Parchment Paper, or a Silicone Mat. Dust the Surface of the Refrigerated Dough With Flour and Cut Off a 1-Pound (grapefruit-Size) Piece. Dust the Piece With More Flour and Quickly Shape It Into a Ball by Stretching the Surface of the Dough Around to the Bottom on All Four Sides, Rotating the Ball a Quarter-Turn as You Go. |
|
6
Done
|
Divide the Ball Into Thirds, Using a Dough Scraper or Knife. Roll the Balls Between Your Hands (or on a Board), Stretching, to Form Each Into a Long, Thin Rope. If the Dough Resists Shaping, Let It Rest For 5 Minutes and Try Again. Braid the Ropes, Starting from the Center and Working to One End. Turn the Loaf Over, Rotate It, and Braid from the Center Out to the Remaining End. This Produces a Loaf With a More Uniform Thickness Than When Braided from End to End. |
|
7
Done
|
Allow the Bread to Rest and Rise on the Prepared Cookie Sheet For 1 Hour and 20 Minutes (or Just 40 Minutes If You're Using Fresh, Unrefrigerated Dough). |
|
8
Done
|
Twenty Minutes Before Baking Time, Preheat the Oven to 350f If You're not Using a Stone in the Oven, 5 Minutes Is Adequate. Brush the Loaf With Egg Wash and Sprinkle With the Seeds. |
|
9
Done
|
Bake Near the Center of the Oven For About 25 Minutes. Smaller or Larger Loaves Will Require Adjustments in Baking Time. the Challah Is Done When Golden Brown, and the Braids Near the Center of the Loaf Offer Resistance to Pressure. Due to the Fat in the Dough, Challah Will not Form a Hard, Crackling Crust. Allow to Cool Before Slicing or Eating. |


