
Ingredients
-
4
-
1
-
1 1/4
-
1/2
-
-
-
-
-
-
-
-
-
-
-
Directions

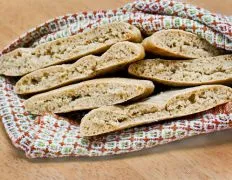
Healthy Whole Wheat Pita Bread (No Oil or Sugar), Just 4 ingredients and the salt is optional! Please note that the cooking time includes a 30 minute rising The kneading times given are for an electric mixer (use my Bosch), so it will take a little longer if you do it by hand You can easily turn these into herbed pitas by simply adding in some of your favorite herbs (fresh or dried) while you’re kneading the dough EDITED TO ADD: You need to add only the amount of flour necessary to clean the sides of the bowl So, you might not need all of the flour listed Also, this is a flatbread, so it will not rise a lot – not at all like regular yeast bread It is also important to preheat the oven and just before you put the pitas in, flip them over That is what causes them to puff This recipe works very well, we use it all of the time and love it! But, it is one of those that really needs to be followed step by step You’re welcome to zmail me if you have any trouble!!, What is the best way to store homemade pitas and best way to store?, Other than cutting the recipe in half, I made these exactly as described used a little more than 1 cup of ww flour (since this was a half recipe), plus what I added for the kneading and rolling out The pitas came out perfectly, nice and puffed up
Discover ground-breaking new supplements! SHOP & SAVE
Steps
|
1
Done
|
Preheat Oven to 500f. |
|
2
Done
|
Sift Together 2 Cups of Flour and the Yeast. |
|
3
Done
|
Add Water and Salt and Mix Well. |
|
4
Done
|
Gradually Add in the Remaining Flour Just Until the Dough Begins to Clean the Sides of the Bowl. Once This Happens, Stop Adding Flour (so, You Might not Use All the Flour the Recipe Calls For.). |
|
5
Done
|
Knead the Dough For About 4 or 5 Minutes, or Until Dough Is Smooth and Elastic. (while You're Kneading, You Can Get Creative and Add in Some Herbs or Spices, but Only If You Want to Do That). Be Careful not to Over-Knead the Dough. |
|
6
Done
|
Form Dough Into 10 Balls. |
|
7
Done
|
on a Floured Surface, Roll Each Ball Into a 5-6 Inch Circle, About 1/4 Inch Thick. (be Sure to Sprinkle a Little Flour on Both Sides to Prevent Sticking). |
|
8
Done
|
Place on a Non-Stick Baking Sheet and Allow to Rise 30 Minutes, or Until Slightly Raised. |
|
9
Done
|
Just Before You Place the Pan in the Oven, Flip Each Pita Over on Its Other Side. |
|
10
Done
|
Bake on the Bottom Rack of the Oven For 5 Minutes. (the Instant Hot Heat Will Help Them Puff Up). |
|
11
Done
|
When the Pitas Come Out of the Oven They Will Be Hard, but They Will Soften as the Cool. |
|
12
Done
|
Store Them, While They're Still Warm, in Plastic Baggies or an Airtight Container. |
|
13
Done
|
Cut the Pitas in Half Crosswise and Stuff With Your Favorite Fillings (beans and Rice, Taco Fixings, Thick Stews, Curries - Anything Goes). |
|
14
Done
|
Pitas Can Be Reheated in a 350f Oven or in the Microwave. |