Ingredients
-
6
-
1 1/2
-
-
-
-
-
-
-
-
-
-
-
-
-
Directions
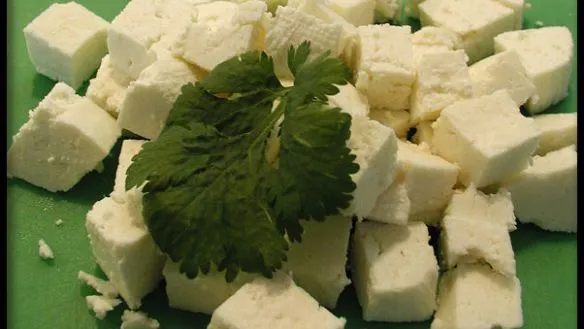
Homemade Paneer (Panir – Indian Cheese),Paneer is a simple, mild-flavored Indian cheese. Once you make this, you will have a new appreciation for the Little Miss Muffet nursery rhyme, for you will know the meaning of curds and whey. More importantly, you will be able to enjoy lovely Indian dishes like Palak Paneer (spinach, cheese and spice curry), Mattar Paneer (green peas, tomatoes spices and paneer), and many more. OTHER PANEER RECIPES use lemon juice instead of yogurt, but the yield is smaller with that method. To go that route, use 3-4 tablespoons lemon juice instead of the 1 cups yogurt called for. You could also use 2 tablespoons apple cider vinegar diluted with 2 tablespoons water, adding this to the 6 cups of milk. TO AVOID SPILLS when the milk bubbles up, be sure to use a large, deep saucepan. From Nancie McDermotts The Curry Book.,I can’t believe how easy making paneer cheese is! It was great. used lemon juice b/c I didn’t have yogurt. We served with saag and homemade naan!,I can’t find paneer around here so made this myself. So easy and turned out great. I did press it longer than stated. Refrigerated until the next day to use in Recipe #25348.
Discover ground-breaking new supplements! SHOP & SAVE
Steps
|
1
Done
|
Prepare a Place For the Paneer to Drain, Placing a Colander in the Sink and Lining It With 4 Thicknesses of Cheesecloth or a Clean Linen Kitchen Towel. |
|
2
Done
|
Ina Large (at Least 3 Quart) Saucepan, Bring the Milk to a Boil Over High Heat, Stirring Almost Constantly to Prevent It from Burning or Boiling Over. |
|
3
Done
|
as Soon as the Milk Comes to the Boil, Add the Yogurt and Sir Gently. the Milk Will Soon Foam Up Into Soft Clouds and Then Break Into Thick Curds of Cheese Floating in a Thin, Faintly Greenish Liquid Called Whey. |
|
4
Done
|
Remove from the Heat and Pour the Contents of the Saucepan Into the Cheesecloth-Lined Colander Placed in the Sink to Drain Away the Whey. |
|
5
Done
|
When the Cloth Is Cool Enough to Handle, Bring Its Corners Together and Squeeze the Cheese Into a Ball, Twisting the Top Portion of the Cloth to Force Out More Liquid and Then Securing It With a Rubber Band. |
|
6
Done
|
Suspend the Cheese from the Faucet and Let It Hang Over the Sink For About 30 Minutes to Drain Off Any Remaining Whey. |
|
7
Done
|
Now Press the Cheese to Make It Firm Enough to Cut. to Do This, Place the Wrapped Lump of Cheese on Its Side in a Pie Pan or Frying Pan, and Place Another Pie Pan or Frying Pan of Equal or Smaller Size on Top of It, or Cover the Cheese With a Plate. Balance a Weighty Object, Such as a Teapot Filled With Water, on the Pan or Plate to Compress the Cheese. as You Can See in the Photos, I Put the Wrapped Cheese in a Bowl, Placed a Smaller Bowl on Top of That and a Large, Full Bottle of Wine Into That Bowl. Press For 30 Minutes More. |
|
8
Done
|
Carefully Unwrap the Pressed Cheese, Cut Into -Inch Cubes, Transfer It to a Container and Seal Tight. Refrigerate Until Needed. the Paneer Will Keep 3 to 4 Days in the Refrigerator and Several Months in the Freezer. |

