Ingredients
-
4
-
4
-
3
-
1/4
-
1/2
-
-
-
-
-
-
-
-
-
-
Directions
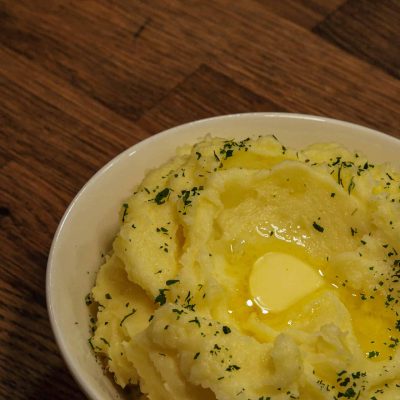
Mashed Yukon Golds with Roasted Garlic, Do not be freaked out by the amount of garlic called for; roasted garlic is very mellow Try to use Yukon Gold potatoes in this dish; they mash well and have wonderful colour The aroma of the roasting garlic is heavenly, so this is a great recipe to do when you have company coming over, as they will be absolutely salivating from the moment they walk through your door!, Really, really tasty Worth all of the effort The flavor of the roasted garlic really stands out in this, but it is a mellow flavor – not biting Creamy, fluffy rich tasting potatoes, with clear instructions , Do not be freaked out by the amount of garlic called for; roasted garlic is very mellow Try to use Yukon Gold potatoes in this dish; they mash well and have wonderful colour The aroma of the roasting garlic is heavenly, so this is a great recipe to do when you have company coming over, as they will be absolutely salivating from the moment they walk through your door!
Discover ground-breaking new supplements! SHOP & SAVE
Steps
|
1
Done
|
You First Need to Make the Roasted Garlic; Four Heads Are Enough For This Recipe, but I Suggest You Do More, as the Roasted Garlic Keeps in the Fridge For at Least a Week, or It Can Be Frozen (squeeze the Garlic Buds Out of the Skins First) and Then You Can Just Break Off What You Need. |
|
2
Done
|
to Prepare Roasted Garlic, Preheat Oven to 375f. |
|
3
Done
|
Using a Sharp Knife, Cut Off the Top Third or So of Each Garlic Bulb, Exposing the Cloves; Remove All the Papery White Skin That You Can, but Leave the Bulb Intact. |
|
4
Done
|
Place Cut Garlic Heads on a Piece of Foil That Is Big Enough to Just Come Up Around the Heads and Cover Them. |
|
5
Done
|
Drizzle About 1 Tsp of Olive Oil Over the Exposed Top of Each Head. |
|
6
Done
|
Bring Foil Up Around the Heads to Seal, Then Place This Foil Package on a Pie Plate and Slide Into Preheated Oven For About 40 to 50 Minutes; When Done, Garlic Will Be Very Soft. |
|
7
Done
|
as Soon as It Is Cool Enough to Handle, Squeeze Garlic Into a Small Bowl and Set Aside; If You Are Ambitious, Keep the Roasted Skins That Are Left Behind and Use Them in a Stock. |
|
8
Done
|
You Can't Get Around It, Your Fingers Are Going to Get Garlicky and Sticky--but It Really Is a Fun Task! |
|
9
Done
|
Now, to Make the Potatoes (and All You're Really Doing Now Is Making Mashed Potatoes, Likely the Way You Always Do): Put Chopped Potato Chunks in a Large Pot and Cover With Cold Water, Lightly Salt, and Bring It to a Boil Over High Heat. |
|
10
Done
|
When Potatoes Are Cooked Through (test With the Point of a Sharp Knife or a Fork), About 20 Minutes After the Potatoes Boil (depending on How Big You Cut Your Chunks), Drain Well and Then Return to Pot; With Heat on High, Shake Potatoes Around in Pot For About 20 to 30 Seconds to Dry Them Out a Bit; Then Remove Pot from Burner. |
|
11
Done
|
Using a Potato Masher, Mash Potatoes, Adding Soft Butter and the Roasted Garlic. |
|
12
Done
|
When All Chunks Have Been Mashed, Add Half of the Warm Milk (or Cream, If You Wish) and Keep Mashing; Add More Milk If Needed Until Potatoes Are the Consistency You Want. |
|
13
Done
|
Try the Potatoes; Add Salt and Pepper to Taste. |


