Ingredients
-
1
-
1
-
1
-
2
-
1
-
2
-
1
-
1
-
1
-
1
-
-
-
-
-
Directions
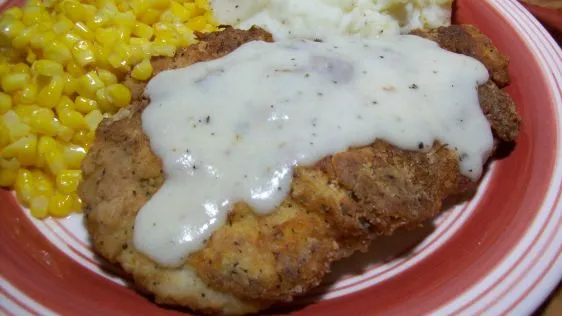
Pat’s Southern Fried Chicken, This is a “no-fail” recipe for people who have trouble making good fried chicken. It averts the problem of the coating falling off, it’s very tender, and it’s big on flavor. There are three “tricks” here that make this recipe so successful: “dusting” the chicken ahead of time, using Crisco, and not “crowding” the chicken in the skillet. If there are certain herbs or spices that suit you better than the ones listed, go ahead and make changes but remember that not all of it gets on the chicken as you dredge it so you’ll usually add more about twice as much than if you were putting it directly on the chicken as it cooks. Good luck and good eats!, I made this on 12/17/08 for mine and my SO’s dinner.Instead of using a frying chicken, used the same weight of boneless skinless chicken breasts.Other than that, I followed the recipe pretty much as written.Since used the boneless chicken, Step 1 was skipped.After doing Steps #3 and #4 I fried a small piece of the chicken to see if the seasonings needed to be adjusted.And I did adjust the seasonings as follows, I added 1/2 teaspoon more of the Old Bay Seasoning, and added about 1/2 teaspoon more of ground black pepper. And I left the amount of oregano the same. Since the type of chicken was changed, the step about placing it in the oven was skipped.This recipe was served with corn and mashed potatoes. And in the South, there’s an unwritten law when you have fried chicken and mashed potatoes you have to have gravy with it. :So I took some of the chicken “drippings” and some of the seasoned flour and made a gravy to serve over the potatoes. And I have to tell you, my SO and I both enjoyed the flavor of the this recipe.This will be made again. Thanks for taking the time to post this recipe and, “Keep Smiling :”
Discover ground-breaking new supplements! SHOP & SAVE
Steps
|
1
Done
|
Cut Up the Chicken, Setting Aside the Back, Neck, and Organ Meat to Make Stock For Other Recipes. Cut the Last Joint Off the Wing Tips Too and Add to Chicken Parts For Stock. Obviously, You Can Buy a Whole Fryer Already Cut Up If You Wish. You Can Trim Excessive Skin and Some Fat but Leave the Main Part of the Skin on Each Piece of Chicken! |
|
2
Done
|
Carefully Dry Each Piece of Chicken With a Paper Towel. Pour 1 Cup of Flour Into a Paper Bag and Dust Each Piece of Chicken, One at a Time, by Shaking It in the Bag. Set All This Chicken Aside on a Tray and Let It Sit Until the "whiteness" Fades About 30 Minutes. |
|
3
Done
|
Beat the Eggs With a Fork or Whisk in a Wide Shallow Bowl. Add the Buttermilk to the Eggs and Beat For Another Few Seconds and Set Aside. |
|
4
Done
|
on a Large Platter or Plate, Mix Together the Two Cups of Flour, Baking Soda, Pepper, Salt, Basil, Old Bay and Oregano; Set Aside. |
|
5
Done
|
Preheat the Oven to 375f. |
|
6
Done
|
on the Stovetop, in a Large Skillet, Heat the Crisco Until It Is Very Hot, About 375 Your Chicken Should Really Crackle and Sizzle When It Goes Into the Oil -- If not, Then the Oil Is Too Cold!. |
|
7
Done
|
"drench" Each Piece of Chicken in the Buttermilk/Egg Mix, Allow It to Mostly Drip Off, and Then "dredge" It in the Flour Mix Until It Is Evenly Coated. as Each Piece Is Coated, Place It Into the Hot Oil. Do not Crowd the Chicken! You May Have to Make Two or Three Batches, Depending Upon Your Skillet Size, So Don't Drench and Dredge Until You Are Ready to Fry Each Piece. |
|
8
Done
|
Fry the Chicken to a Golden Brown on Each Side, Turning It Once. as the Chicken Comes Out of the Skillet, Place Each Piece on a Baking Sheet Make Sure That It Has Sides -- Some Grease Will Drain Off the Chicken as It Bakes. |
|
9
Done
|
When All the Chicken Has Been Fried Up and Placed on the Baking Sheet, Place It Into the Pre-Heated 375 Oven Uncovered For 40 Minutes. |
|
10
Done
|
After the Chicken Comes Out of the Oven, Allow It to "rest" For 10-15 Minutes and Then Serve. |

