Ingredients
-
1 1/2
-
1/3
-
1
-
1/2
-
-
-
-
-
-
-
-
-
-
-
Directions
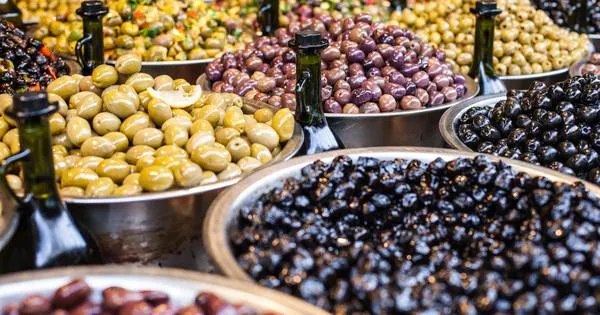
Pickled Olives,I searched everywhere for this recipe!! A friend gave me a bag of green olives, because I had said I would like to try pickling my own. I love the whole Greek thing, making your own cheese and all that. Anyway, I finally found this recipe in a Womens Weekly book. Putting it here so I don’t have to search! It is excellent, better then the bought one :),OMG, OMG. OMG we’ve been eating these for days at mummamills home. We’ve been stranded here while our car needs to be fixed, so we keep eating!!!!!
Discover ground-breaking new supplements! SHOP & SAVE
Steps
|
1
Done
|
Pick Over the Olives, Discard Any With Big Blemishes. |
|
2
Done
|
With a Parring Knife, Cut Down the Side of the Olive, Thru to the Stone, Then Turn Over and Repeat on the Other Side. |
|
3
Done
|
Place the Olives in a 2 Litre (8 Cup) Sterilized Jars, Untill the Jars Are 2/3 Full, Then Cover Olives With Cold Water. |
|
4
Done
|
to Keep the Olives Submerged, Fill a Small Plastic Bag With Water, and Sit It on Top of the Olives. (used a Sandwich, Ziplok Bag). |
|
5
Done
|
Change the Water Daily, Scum May Appear on the Surface, but That's Fine. Change the Water For 4 Days With Black Olives, and For 6 Days With Green Olives. |
|
6
Done
|
Combine the Salt and Water, Stir Over Heat Until the Salt Has Dissolved, Cool. |
|
7
Done
|
Drain and Discard the Water in the Jars, Fill With Enough Salted Water to Cover the Olives. |
|
8
Done
|
Pour Enough Oil Into the Jars to Cover the Olives Completely, and Then Seal the Jars. |
|
9
Done
|
Mark the Date on the Jars and Store in a Cool Dark Place For 5 Weeks. |
|
10
Done
|
After 5 Weeks They Are Ready to Eat, but You Can Then Marinate Them For Another 2 Weeks Using Lemon Wedges and Garlic, or Whatever You Like. |
|
11
Done
|
Cover With Oil. |
|
12
Done
|
Note: Don't Mix Your Olives! They Must Be Pickles Separately. |

